In this chapter, we'll walk you through building a complete API project using GoFrame's scaffolding tools.
Important Note: GoFrame is a professional-grade, engineered development framework for Go that's thoughtfully designed, easy to use, and backed by comprehensive documentation and an active community. Once you experience the productivity benefits of GoFrame, you'll never want to go back to manual development.
If you encounter any challenges while following this quick start guide, feel free to drop a comment in the discussion section 💬. We're here to help and will provide solutions as quickly as possible 🌟🌟.
Installing the Framework Tools
GoFrame provides a suite of development tools that streamline your workflow with convenient commands for project scaffolding, code generation, and framework updates. You can download these tools from: https://github.com/gogf/gf/releases
Pre-compiled Installation
We offer pre-compiled binaries hosted on GitHub for immediate use across different platforms.
macOS Installation
wget -O gf "https://github.com/gogf/gf/releases/latest/download/gf_$(go env GOOS)_$(go env GOARCH)" && chmod +x gf && ./gf install -y && rm ./gf
Common installation issues and solutions:
- If
wgetis missing, install it usingbrew install wget - 🔥 For
zshusers: There might be a conflict with thegfalias (git fetch). After installation, restart your terminal to resolve this - Missing Go environment variables: Ensure your Go development environment is properly set up by following our Environment Setup Guide
- For other issues, try the Source Code Installation method below
Linux Installation
wget -O gf "https://github.com/gogf/gf/releases/latest/download/gf_$(go env GOOS)_$(go env GOARCH)" && chmod +x gf && ./gf install -y && rm ./gf
If wget is not installed:
Ubuntu/Debian:apt-get install wget -yCentOS/RedHat:yum install wget -y
Windows Installation
Download the appropriate binary file and run it. If the installation fails, use the Source Code Installation method instead.
Source Code Installation
For a universal installation method, compile from source using go install:
go install github.com/gogf/gf/cmd/gf/v2@latest
Verifying Your Installation
Run gf -v to verify the installation. A successful installation will show output similar to this:
$ gf -v
v2.7.4
Welcome to GoFrame!
Env Detail:
  Go Version: go1.23.1 darwin/arm64
  GF Version(go.mod): cannot find go.mod
CLI Detail:
  Installed At: /Users/john/go/bin/gf
  Built Go Version: go1.23.1
  Built GF Version: v2.7.4
Others Detail:
  Docs: https://goframe.org
  Now : 2024-10-29T13:30:30+08:00
Note: The Go/GF Version shows the versions used to build the binary, while GoFrame Version indicates the framework version used in your current project (detected from go.mod).
Important Note: 🔥 If you're using zsh, remember to restart your terminal after installation to resolve any potential gf alias conflicts with git fetch.
Creating a Project
gf init demo -u
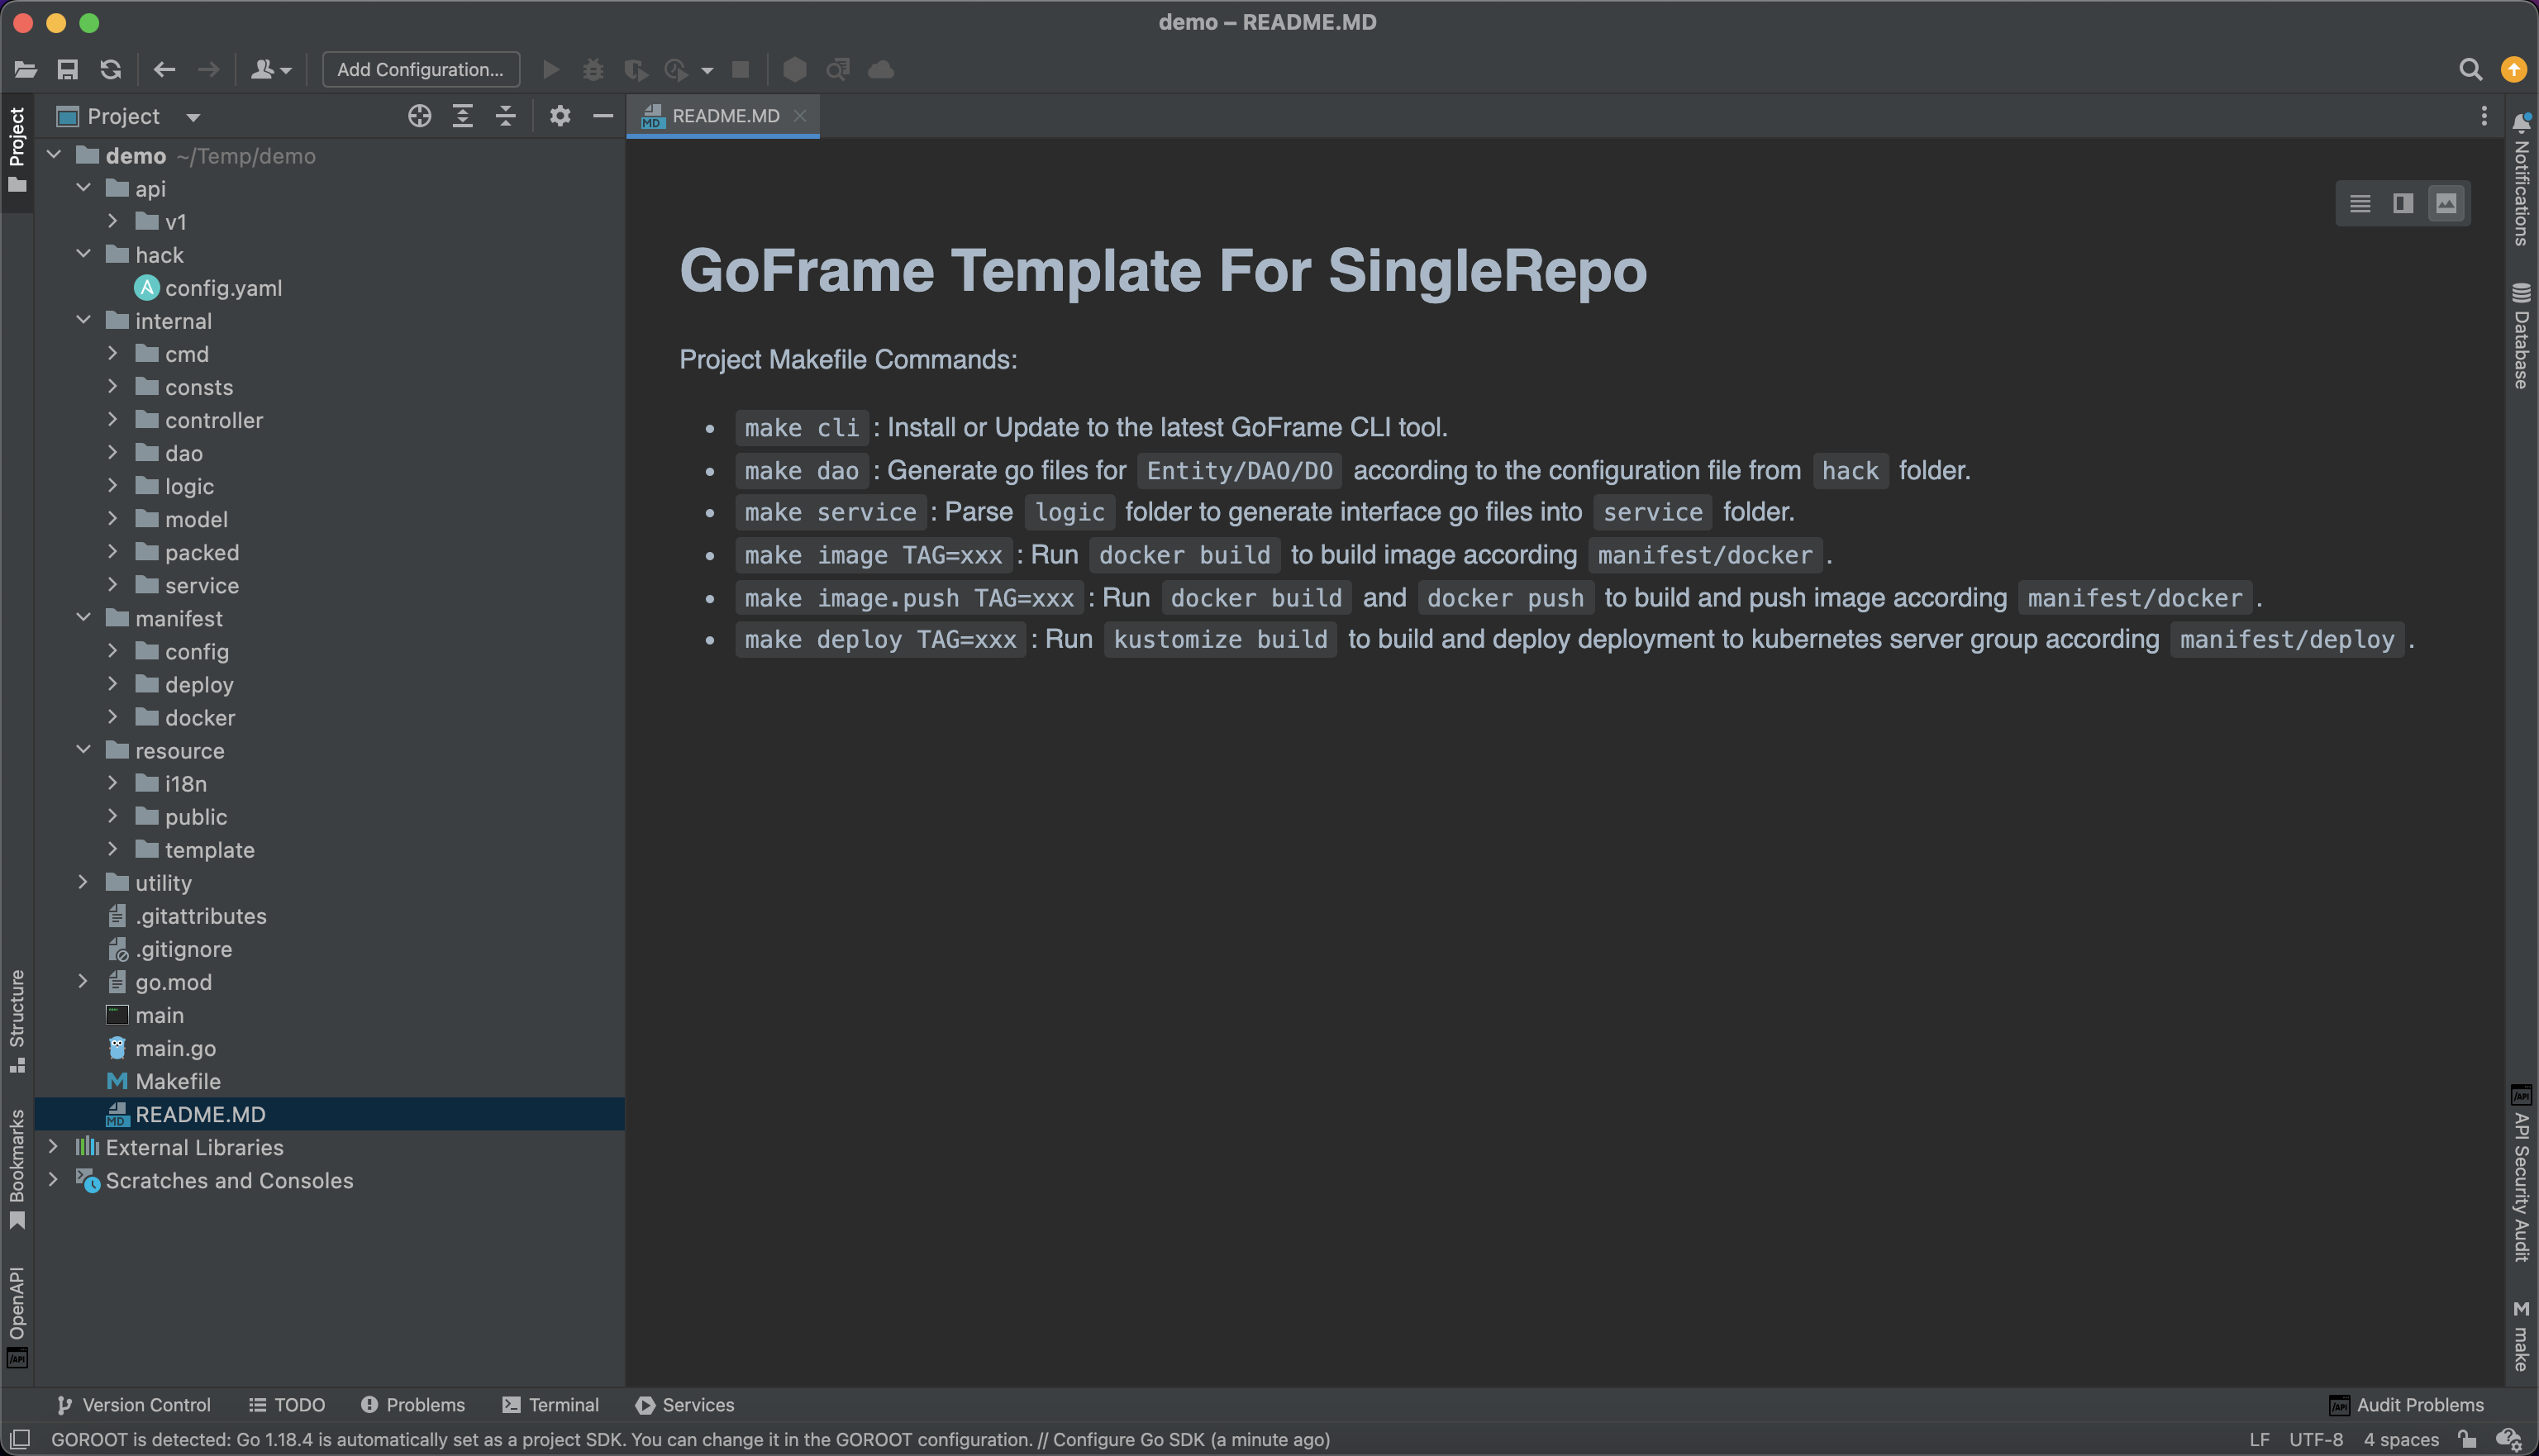
This command creates a project scaffold named demo. The -u flag updates the project's GoFrame dependencies to their latest versions. GoFrame uses a unique project structure optimized for various development scenarios. For detailed information about the project structure, see: Project Structure Guide🔥.
The scaffold provides a versatile structure suitable for web applications, CLI tools, and microservices. By default, it generates an HTTP Web Server template. After understanding the directory structure, feel free to remove any unnecessary directories.

Running Your Project
Start your project with this command:
cd demo && gf run main.go
The gf run command enables hot-reloading during development. You can also use standard go run if preferred.
You'll see output similar to:
$ cd demo && gf run main.go
build: main.go
go build -o ./main  main.go
./main
build running pid: 76159
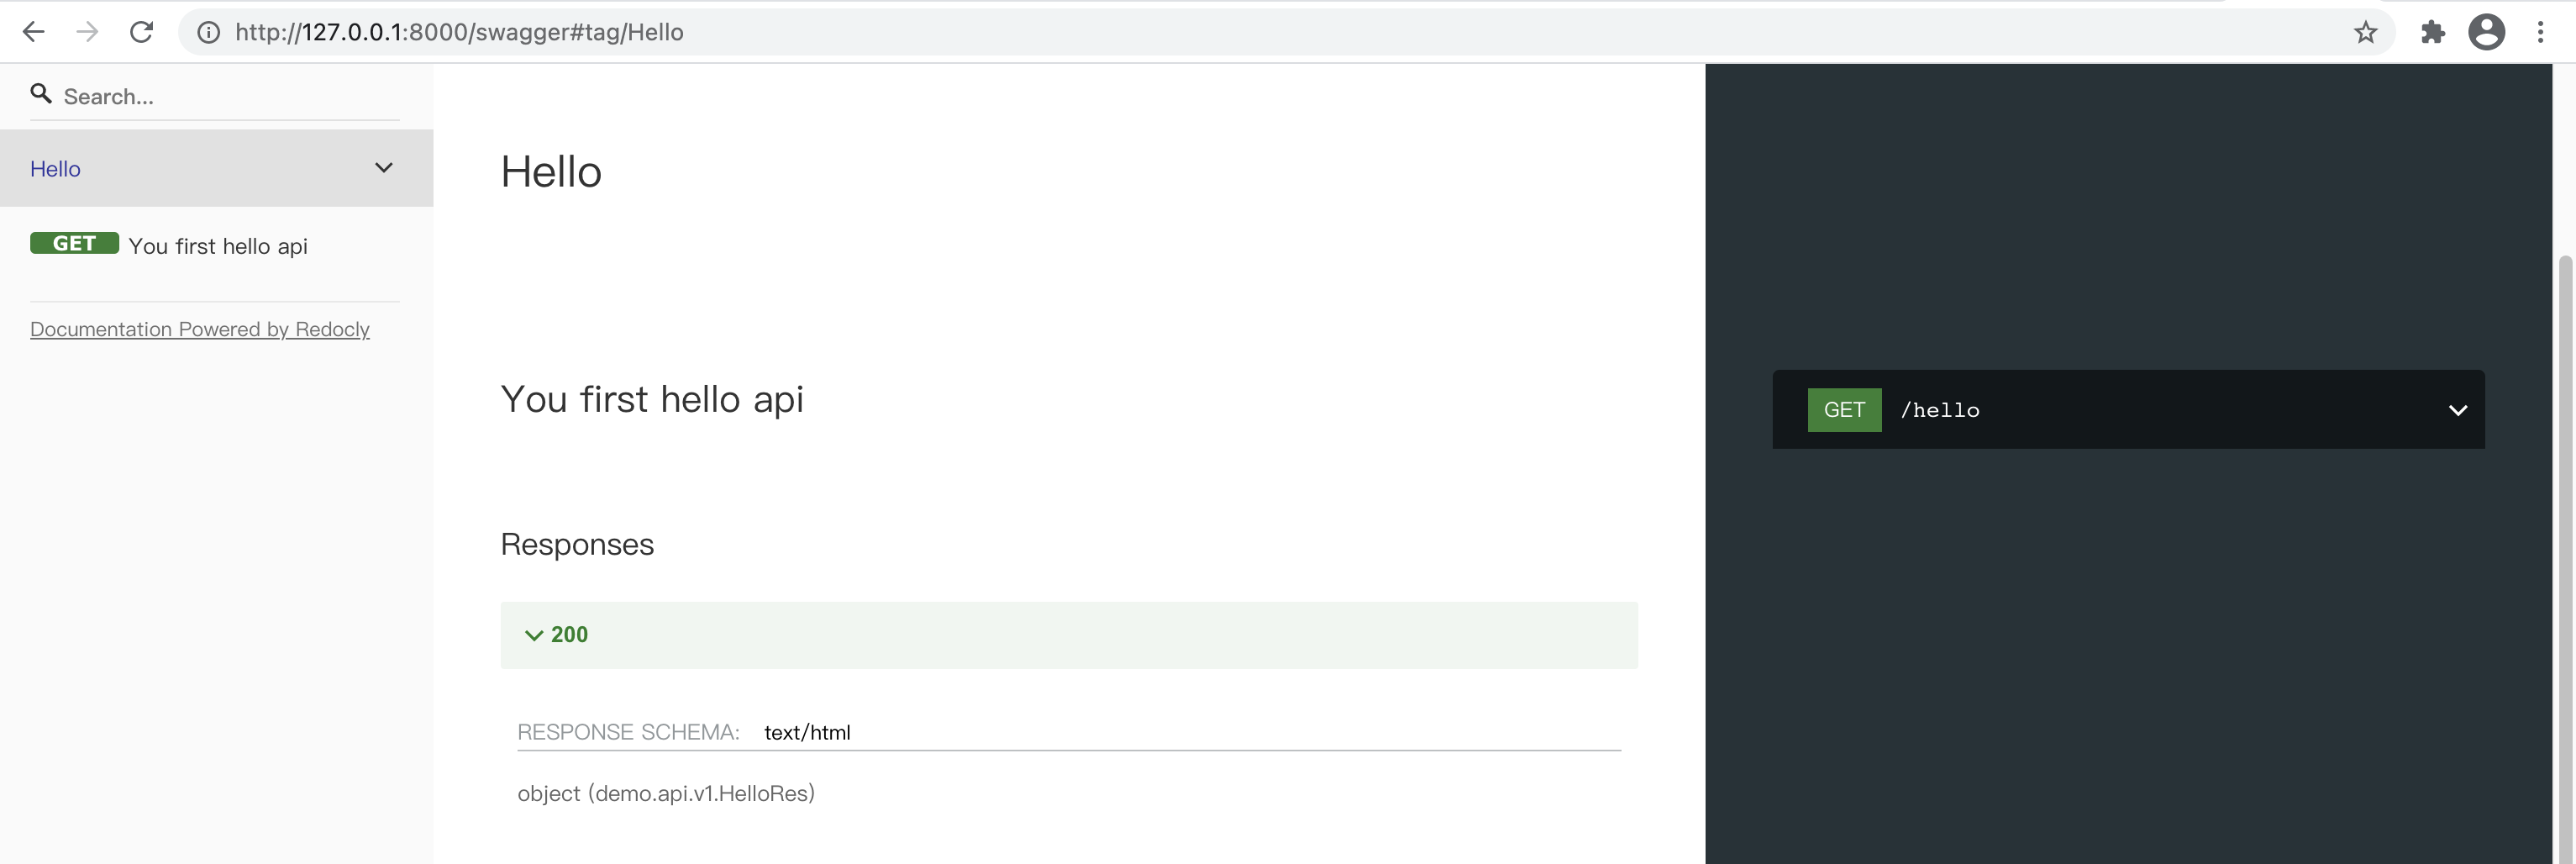
2022-08-22 12:20:59.058 [INFO] swagger ui is serving at address: http://127.0.0.1:8000/swagger/
2022-08-22 12:20:59.058 [INFO] openapi specification is serving at address: http://127.0.0.1:8000/api.json
2022-08-22 12:20:59.059 [INFO] pid[76159]: http server started listening on [:8000]

  ADDRESS | METHOD |   ROUTE    |                             HANDLER                             |           MIDDLEWARE
----------|--------|------------|-----------------------------------------------------------------|----------------------------------
  :8000   | ALL    | /*         | github.com/gogf/gf/v2/net/ghttp.internalMiddlewareServerTracing | GLOBAL MIDDLEWARE
----------|--------|------------|-----------------------------------------------------------------|----------------------------------
  :8000   | ALL    | /api.json  | github.com/gogf/gf/v2/net/ghttp.(*Server).openapiSpec           |
----------|--------|------------|-----------------------------------------------------------------|----------------------------------
  :8000   | GET    | /hello     | demo/internal/controller.(*cHello).Hello                        | ghttp.MiddlewareHandlerResponse
----------|--------|------------|-----------------------------------------------------------------|----------------------------------
  :8000   | ALL    | /swagger/* | github.com/gogf/gf/v2/net/ghttp.(*Server).swaggerUI             | HOOK_BEFORE_SERVE
----------|--------|------------|-----------------------------------------------------------------|----------------------------------
By default, your application will:
- Run on port
8000 - Enable
OpenAPIdocumentation - Provide a
Swagger UIinterface - Display all route information in the terminal
- Include a sample
/helloendpoint
Try accessing: http://127.0.0.1:8000/hello

Explore the API documentation through Swagger UI:

Upgrading the Framework
To update to the latest framework version, run this command in your project's root directory (where go.mod is located):
gf up -a
Chapter Summary
In this chapter, you've learned how to:
- Install the GoFrame CLI tools
- Create a new project using the scaffold
- Run and test your application
Next, we'll explore the project startup process in detail.